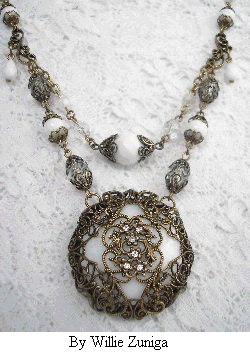
Many of you have written to me over the years to ask questions about how to get started designing jewelry. I started my design career in my mid-thirties with very little money (less than $10.00) and no training at all, while working another full time job. You can do it too!
I’ll give you a few pointers on this site and you can fill in the blanks with your own creative ideas. The most important thing to have in this business is imagination! Take a basic idea and make the design your own.
Don’t be afraid to cut pieces apart, bend or hammer them into different forms. The pieces you buy from me are brass which is a soft composite metal which can be manipulated easily. The only warning I can give is that the plating may “pop” off of items that have been plated bright gold or sterling silver. This is one of the reasons I mostly offer items in the oxidized (OX) finish. The cut edges need to be buffed with a file or if you are really professional, a Dremel tool.
When working on a special order or project, you should buy all the pieces of an item you need at the same time. Plating, beads and stone colors rarely ever match exactly from one shipment to the next. Keep in mind that all the plating and stone colors matching perfectly isn’t necessarily a good thing. The piece will look machine made if every jump ring and head pin matches exactly. This was tough for me to adjust to since I’m also a perfectionist.
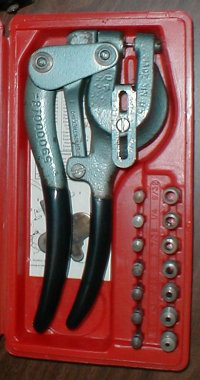
If you would like to add holes to pieces where there are none, I recommend this Whitney Roper #5 Jr. Hand Punch. You can often find them on eBay with the dies included for about $60.00. The heavy duty custom made case is included with instructions on how to use and change the dies.
The one I use most often is the 1.5mm die but you can use the other size dies to punch much bigger holes. If you are careful not to damage the dies they will last for a lifetime. I’ve used this tool for about twenty years and it is still like new.
Another tip:
Use jean rivets to join filigrees with other filigrees or settings with rivet holes.
This great tip comes from Mari Anne Street (no relation). She uses the jean rivets from a fabric store with a little tool that you can also buy there. You also need a hammer but she used the jean rivets to join three filigrees together and it worked great. If you have a metal punch like the one above you can add the holes you need where there are none.
We may earn a small commission if you make a purchase from 3rd party links above at no additional cost to you.
Visit our store web site VintageJewelrySupplies.com
(NOTE: our website best viewed on desktop or tablet)