When you find a beautiful cabochon in a non standard size, you may reject it knowing how hard it is to find settings for those stones. The lesson below shows you how to create a setting for any size or shape stone.
Step 1
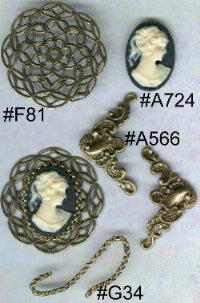
Choose a flat stamping with openwork or a filigree as the base, which will allow lots of open areas from which to attach strands of beads or chain.
Step 2
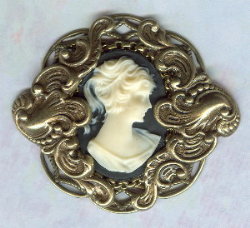
Glue the cabochon in the center. Let the glue set up according to the instructions on the tube. (More about this on our page “E6000 Glue Tips”.)
Step 3
Add chain, beads, stones, trim or other stampings to rim the cabochon so that it appears to be in a setting.
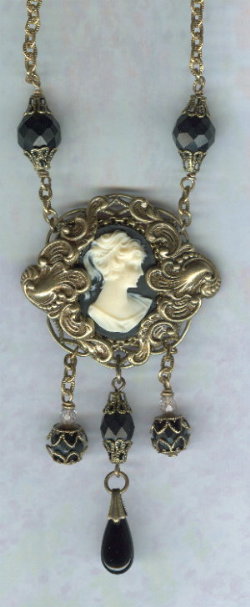
In this picture you see an example of a finished piece using this technique and all the items pictured above plus beads, bead caps and chain which can also be found at both of our web sites.
Wrapping an odd shaped stone in filigree is another great alternative to trying to find the proper size of setting.
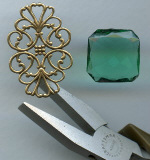
Step 1: Place the stone on the center of the back side of the filigree to visually decide if it is a good fit.
Step 2: Imagine straight lines around the shape of the stone. I added the pink lines in the following image to show you each bend I made starting from the center and working my way out. At least two of the sides of the filigree need to be folded up and over the top edge of the stone to keep it inside the filigree.
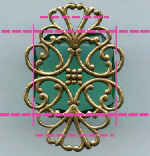
Use these caged stones either point up or point down if they don’t have foiled backs. Position pliers along the edge of one of the imaginary straight lines and bend the filigree up on four sides.
Step 3. Insert the stone into what is now a filigree box. While holding the stone in place with your thumb and index finger, gently push the filigree edges over the top side of the stone. If you wish to use glue to set either the stone in the filigree before closing it or onto another object, I recommend E6000 glue.
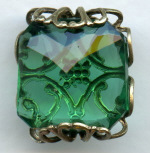
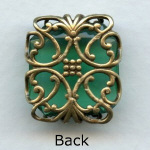
Our item #W95 is a great piece to wrap around smaller stones. Below, I’ve wrapped it around a lovely old 19mm square emerald green stone. The openwork of the filigree corners provides loops to add jump rings.
I used these flat nose pliers I found in the tool section of Sears. They are smaller for craft use and the handle is padded. You should wrap tape around the noses to pad them so as not to mar the filigrees and stampings. Try not to use the pliers with teeth for wrapping. They make a lot of marks and dents in the metal.
Settings
Standard size settings come in several different configurations.
Open back settings are for fully faceted stones. Closed back settings are normally for flat back stones and cabochons. (Cabochons have smooth domes on top with flat backs.)
Deep closed back settings have tiny rims near the top of their walls. Faceted foil backed rhinestones are meant to rest on these tiny rims, not all the way to the bottom of the setting.
Prongs attached to decorative settings are often not intended to do the actual holding of the stone. The stone can be glued into place with a very thin thread-like line of glue. After the glue as set and the stone is firmly held in place, you can gently push the prongs up to the edge of the stone so that they appear to be holding the stone.
Visit our store web site VintageJewelrySupplies.com
(NOTE: our website best viewed on desktop or tablet)