Many people have asked me if I will ever write a book.
Considering that my work days now start at 4 AM and last well into every evening, I don’t think I will ever find the time required for such an endeavor. It is however, a pleasure to put together occasional lessons to show you the basic steps for creating a project. Those lessons are always posted here for free. I’ve been told by my accountant that I give away too many services and products that could be sold, but I believe your actions come back to you.
While I never support copying the work of another artist, you are welcome to use these lessons showing my work, in any way you wish. It is my hope that you will learn a new technique and then go on to create something wonderful with your newly fueled imagination.
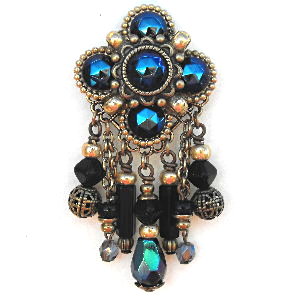
This lesson plan shows you the pieces I’ve used to create the earring in the photo. The holidays bring out the fun jewelry and sweaters but these earrings sold well all year round for me. This was one of my favorite styles of earrings to make as a designer. The earring shown here is only two inches long. I created this style in every color combination you can think of and the boutique owners loved them. They sold for about $50 at retail.
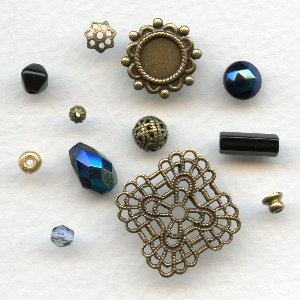
The shopping list for the earring shown above includes these items:
A208A
R614
S171
AA80
AA56
A58
A78
A80
K27
R66
BB53
R73
F01
Start with the cluster setting #A208A and build up from the outside (layering!). Add the flat back jet AB stones first, then glue the smaller setting #R614 to the center space. You may have to do this several different times to make sure the glue holds well. (I always test the hold at each step before going on to the next.) The layering technique requires patience. This same basic pattern can be used to create a centerpiece for a necklace. Just add the filigree to the base and add strands for a necklace instead of dangles for an earring.
I glued seed beads #A80 on their sides to fill in the space around the setting cluster. E6000 is still my favorite glue. If there is bit showing after you do something creative like this, just dab a bit of metallic gold craft paint on the glue. I love that E6000 can be painted!
Crystal AB and Jet AB are great color effects to use. You will find that the colors blend with many other colors.
Small vintage glass beads are always something I look for in my travels. The 4mm bluish ones shown are part of that collection. I also used tiny curb chain as one of the dangle strands doubled with tiny beads attached to the ends. Head pins and small jump rings were also used to make this earring. I used a clip back for these since it is easier to wear this style of earring as a clip. (Safer too!)
Here’s another basic lesson for making dangle earrings…

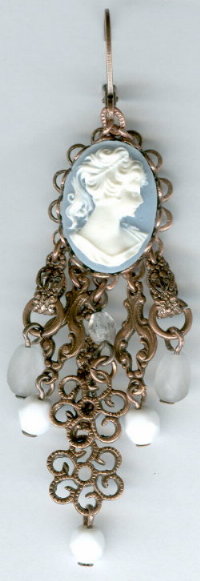
You can create a very functional earring top using two lace edge settings glued together back to back to make a setting with attachment loops.
Gently fold the lace edges of the back setting flat for the background. Next add a cabochon or cameo.
Using headpins, connectors, jump rings and a few vintage beads you can create a small yet dramatic dangle earring. These are only three inches long including the lever back hoop.
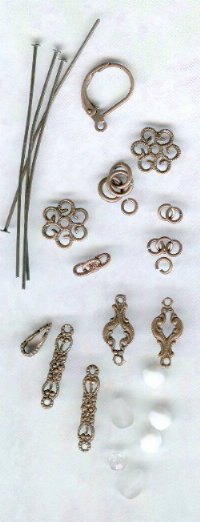
The items in this picture were all used to make the earring shown below. The long narrow filigree connector was folded over to create the bail hoop on the outside edges and then a larger 5mm jumping was used to add the small bead. Don’t hesitate to use more than one item from one jumping as in the center of these strands.
Three links of chain were used to create a centered loop at the top for the lever back earring finding, but you could just as easily add a post back or a clip back to these.
Visit our store web site VintageJewelrySupplies.com to shop for these and thousands more items.
(NOTE: our website best viewed on desktop or tablet)