I’m often asked, “How do I set those odd shaped vintage stones?”
One way is to wrap them in filigree and stampings to create a cage effect. Filigree always has lots of openings from which to attach chain and beaded strands. Please use great caution when folding, bending and otherwise manipulating filigrees and stampings. We do not guarantee that they will hold up to manipulation.
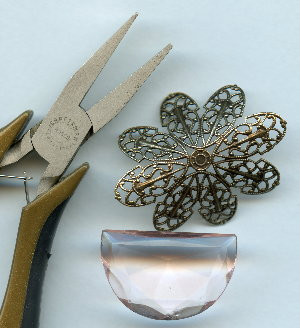
Here I used a half round peach colored vintage glass stones. I placed it inside a partially folded together filigree (Item #A727) and then continued to fold it closed..
In the image below you can see how I folded #B208 around from the opposite side so that the ends overlap. I used flat nose pliers I found in the tool section of Sears. They are smaller for craft use and the handle is padded.
You should wrap tape around the noses to pad them so as not to mar the filigrees and stampings. Try not to use the pliers with teeth for wrapping. They make a lot of marks and dents in the metal.
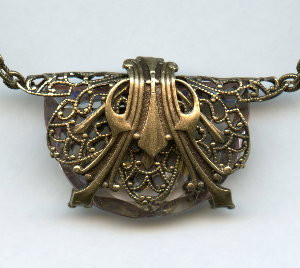
You could layer another smaller setting and stone on top or maybe a small stamping to give the piece a theme. I’ve simply added chain for this example.
Using filigree was very popular at the end of the 1800s. That’s when many of the pieces we offer were first made from the dies still used today. Filigree evolved from pre-Roman ancient Etruscan technique of granulation in gold. It was first created by twisting threads of gold into strands and then using the twisted strands in designs.
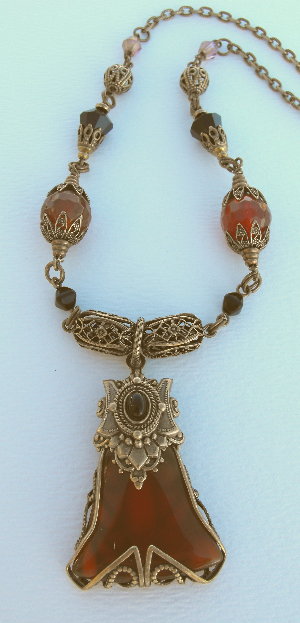
Below is another example of wrapping filigrees around a stone and layering other elements over it.
Using a tiny dot of E6000 to secure the pieces I layered several metal elements along with filigree #T02. The filigree encases a gemstone pendant. I put the wrong sides together so that when the filigree is folded over the stone, the pretty side will show on both the back and the front edges. You may use padded pliers to smooth the edges or make them even.
The filigree should be soft and pliable (malleable) enough to bend without damaging the stone you are using. If you are using a sturdy filigree you will have to measure carefully, make the folds with padded pliers, leaving the top open so that you can slip the stone in place. The last step will be to gently fold over the top so that the stone is caged within the filigree.
I like the look and feel of the added weight of a few different pieces layered together. The layered pieces not only create an interesting design but re-enforce the filigree folded around the pendant.
Using a filigree alone to mount a stone is not only quite difficult to do, it is very fragile to wear.
Caution: The filigrees will break if you bend them too sharply or too often in the same area.
TIP: Practice with a similar size and shaped piece of aluminum foil to determine which filigree will work with your stone and avoid wasting a filigree.

More ideas!
Layering different pieces together allows you to create truly unique settings. The pictures below show you the finished product and then the parts I used to create the piece. Using the links of the chain as jump rings, really helps to unify the design.
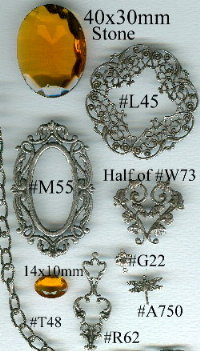
The 40x30mm stone isn’t perfect because it is more than 50 years old, but it doesn’t matter that much, since only a little of the front of stone shows.
Don’t discard something because it has a scratch or breaks in half. It can still play a part in one of your creations.
#L45, #M55, Half of #W73, #G22, #T48, #R62, #A750
Visit our store web site VintageJewelrySupplies.com to shop for these and thousands more pieces for your next project.
(NOTE: our website best viewed on desktop or tablet)